Why Conservation Framing?
What is conservation framing? Have you ever asked your local framer about different levels of framing? When do you ask a framer to use conservation techniques? The answer generally is when a piece of art has value and you want the framing to protect and preserve the art for a long time. That brings us to the more subtle point; when does a piece have value? Is it price, so there’s a monetary value involved? Is it unique – one of a kind – or perhaps a limited edition? Is it personal, something handmade, special only to the receiver?  When it comes to framing, it can be all of these.
Memories are made of this
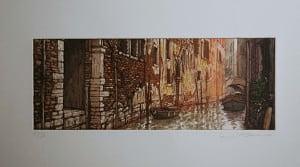
I have finally framed an etching that I bought in Venice a few years back. The piece of art is hand printed and it’s a limited edition, so has a certain monetary value, but more than this, it’s special to me, because I bought it in Venice, from the artist near St Mark’s Square, on a great holiday. So as I worked on framing it, and now as I look at it, I’m transported back to the holiday, to Venice and the trip. This is true of much of the art we buy or are given; while there may be a large or small monetary value, there is a personal aspect that can be so much more, and so it’s important to take care when framing it, as that can enhance or detract from the piece. Chat to your local framer. Tell them about the piece, tell them who it’s for and where it’s likely to hang. All this can influence how it’s framed.
Planning a Conservation Piece
The first image shown above is the piece of art unmounted and unframed. It’s an etching and aquatint (https://en.wikipedia.org/wiki/Aquatint) by Venetian artist, Ugo Baracco. I wanted to use conservation framing techniques and materials so that the work will be protected in its current state for years to come. Also, if the etching is reframed at a later date, anything I have done can be reversed.
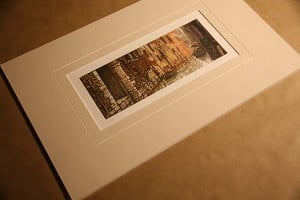
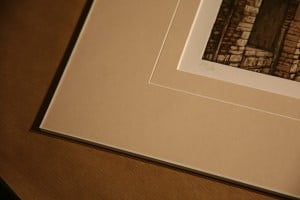
In deciding on the mount and the frame I didn’t want to add too much clutter, but I did want something a little different and opted for not having a standard black frame. I also like a double mount, as the extra layer adds a depth and the extra mount can give a good edge of colour. However in this instance I used a single mount, with a V-Groove running close to the artwork. I think it adds interest, without a fussiness. I also left the white margin, as this is signed and includes the limited edition details. 
For conservation purposes, the mount boards used are conservation grade and the print is hinged to the under mount using gummed conservation tape. Gummed tape is easier to remove than self adhesive tape, so any work done is easily reversed allowing a framer to undo the lot, without damaging the art, in the future.
Working with Glass
Glass is a whole other discussion, and for a conservation piece you want to use the highest UV protection you can afford, to reduce the impact of UV light on the work causing it to fade.
Creating a Sealed Bundle
The final step I like to do is wrap the mounted work, together with the glass and a barrier board, securing them together using conservation tape. In the image on the left, the fine white line is the tape wrapping the bundle. This is not necessarily required for a conservation piece, though some framers insist on it. I like to tape the bundle for a few reasons. The first is that once I have cleaned the glass, it’s great to wrap the bundle and seal it, thus ensuring no bits get in while I’m securing the frame. It’s also easier to work with. Once wrapped, I can drop the whole bundle in the frame and finish it off.
Finishing it off
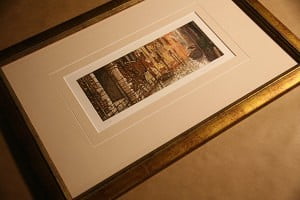
Finally the frame. I settled on a frame with golds and reds, to pick up the colours in the print. It works for me. What do you think? (Click on any of the images to resize)
The last step is the back! You may be surprised to know that most of my clients look at the back (often first!) I think it’s a natural instinct to turn something over, so it’s good to have a neat finish. Framers use different tapes to seal the back of a framed piece. For conservation work, I used gummed tape and finish with a paper backing. As described above, the gummed tape is easy to remove; just wet the tape and it’ll lift off. Then to seal the deal, I add a paper backing, which gives a clean neat finish.

